Associating Subjects with an Information Record
You have setup an Information Record![]() Information Records in Clooz hold the content information coming from a document or other source. These differ from a Source record that contains most of the citation information describing the docment, or the Repository record referring to the facility or online service where the document was found. to hold the data contained in a document you found, and hopefully already cited the source
Information Records in Clooz hold the content information coming from a document or other source. These differ from a Source record that contains most of the citation information describing the docment, or the Repository record referring to the facility or online service where the document was found. to hold the data contained in a document you found, and hopefully already cited the source![]() A source record in Clooz should be viewed as the higher level components of a source citation. Citation details are pulled from the citing Information Record. of that information. Some of the information was general in nature, but much of what you care about even more is who were the people mentioned in the document and what information was contained about them. To record this information you have to setup Subject records
A source record in Clooz should be viewed as the higher level components of a source citation. Citation details are pulled from the citing Information Record. of that information. Some of the information was general in nature, but much of what you care about even more is who were the people mentioned in the document and what information was contained about them. To record this information you have to setup Subject records![]() These are records in the Clooz database representing the Subjects being researched, and contain summary information about the Subject such as the birth, marriage, and death dates for people. in Clooz (if you believe they might be new to your Clooz database), and then link the Subject
These are records in the Clooz database representing the Subjects being researched, and contain summary information about the Subject such as the birth, marriage, and death dates for people. in Clooz (if you believe they might be new to your Clooz database), and then link the Subject![]() Subjects are the objects you are gathering information about. In most cases with Clooz, this is people. However, Clooz supports several other types of subjects such as businesses, real estate/buildings, ships and artifacts. records to the Information Record. After doing that you will then be entering the detailed information about them.
Subjects are the objects you are gathering information about. In most cases with Clooz, this is people. However, Clooz supports several other types of subjects such as businesses, real estate/buildings, ships and artifacts. records to the Information Record. After doing that you will then be entering the detailed information about them.
When setting these Subject to Information Record links, there are two basic things you need to identify:
-
What type of Subject is it? In probably 99% or more of the cases it will be a person. However, Clooz does support other Subject types (businesses, real estate
 Real estate or buildings is a Subject type in Clooz. This could be any type of property: land plot, farm, building, etc., ships, artifacts Artifacts are one of the Subject types in Clooz. They are meant to represent physical objects that have some significance in your research or family history.) since they might be what you are researching.
 -
Is this Subject already in your database? This makes a difference in how you will proceed. However, this decision isn't quite so easy as the first one was. In many cases the names match someone you already have as a Subject and your first reaction is that you know who the person is; but after considering the possibility it is someone else you might not be so sure. The safe approach in Clooz is to treat these as new Subjects. Later on, when you have overwhelming evidence that several of your Subjects are in fact the same person, it's easy to merge the Subject records. It's much more difficult to separate a Subject out into multiple Subjects after you made some premature assumptions that they were the same person. All of that said, there will be times when you are absolutely certain you have the Subject identities correct and want to jump ahead to linking in the existing Subject rather than creating a new one.
 Once you've sorted that out in your head, its time to move forward and setup these links in Clooz. At the bottom of the Information Record editor you will find the buttons to create these Subject to Information Record links. You will either create a new Subject of the selected type, or link an existing Subject.
Selecting the Subject Type
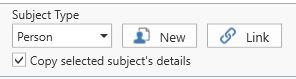
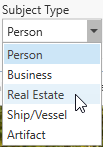 Regardless of whether this is a new Subject or linking an existing Subject, the first step is to make sure the type of Subject listed is what you need. If it not showing the type of Subject you want to add, click the down arrow to display the list of Subject types permitted with the current Information Record template.
Adding a New Subject
Click the New button to have Clooz create a new Subject record and link that Subject to the Information Record all in one operation.
Clooz will automatically give the Subject the name you enter in the Information Record details for that Subject (i.e., the actual name shown in the document you are recording). You can later adjust the name in the Subject record itself to be a more common spelling or preferred form of the name.
You can edit the Subject record while still in the Information Record editor using the fields shown in the right side panel under the Subject tab. The values show here are the Subject record for the Subject currently selected row in the list of linked Subjects or grid of details (depending on what type of template it is, form-based or tabular).
Linking an Existing Subject
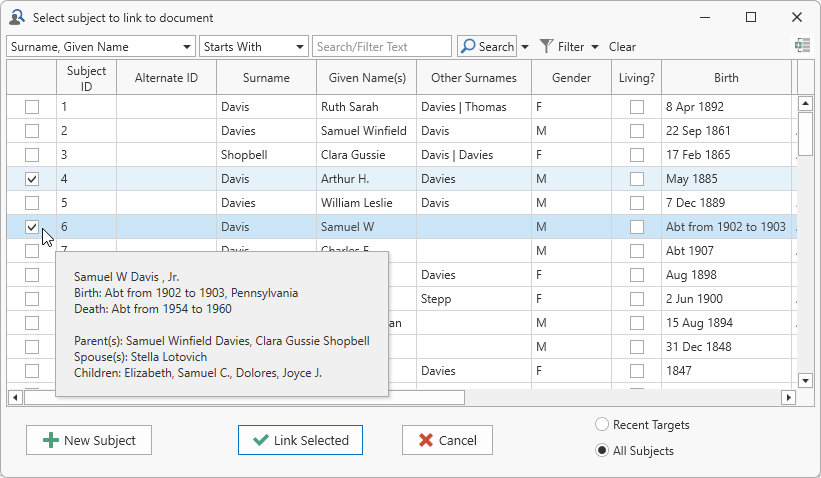 Click the Link button to link existing Subjects to the Information Record being edited. After clicking this button, a Subject Selection dialog window will appear for you to choose one or more Subjects to link.
To link one Subject, double-click that row in the Subject Selection dialog. To link a set of Subjects, click the check boxes on the left side of the Subjects you want to include. Then click the Link Selected Subjects button to link all of those selected to the Information Record.
Target Subjects
The Subject Selection dialog provides an option to display a limited list of Subjects by selecting the option in the lower right corner of the form. This is either based on the Subjects linked to the most recently saved Information Records (the number of Information Records being controlled by a user selectable program option), or Information Records being edited through a Research Task![]() A search or analysis action to be conducted while attempting to fulfill a Research Objective. on the Planning tab page.
A search or analysis action to be conducted while attempting to fulfill a Research Objective. on the Planning tab page.
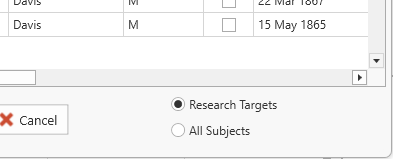 If the Information Record editor was activated from a Research Task, and the Research Objective
![]() What you are trying to accomplish while researching some specific issue, question, or hypothesis. associated with that task had targeted Subjects designated, an additional feature becomes active. The Subject selection dialog includes the ability to display only the target Subjects or all Subjects. Select the desired list choice in the lower right corner of the selection window.
What you are trying to accomplish while researching some specific issue, question, or hypothesis. associated with that task had targeted Subjects designated, an additional feature becomes active. The Subject selection dialog includes the ability to display only the target Subjects or all Subjects. Select the desired list choice in the lower right corner of the selection window.
Right-click a row to display a popup window providing additional information to help identify the Subject. For people Subjects, this includes their family relationships (assuming you had earlier entered Information Records associated with those people that included family descriptions).
The list of Subjects in the Subject Selection dialog can be searched and filtered using the same toolbar methods as on the main screens of Clooz.
Copying Subject Details
When the Copy selected subject's details checkbox is checked, Clooz copies a subset of the detail fields from one Subject's details into the newly added Subject. These are fields which have been determined to be more likely than not the same as the previous Subject (such as surname when entering what is usually a family unit). The examples shown here are from a form-based template, but the same applies to tabular templates.
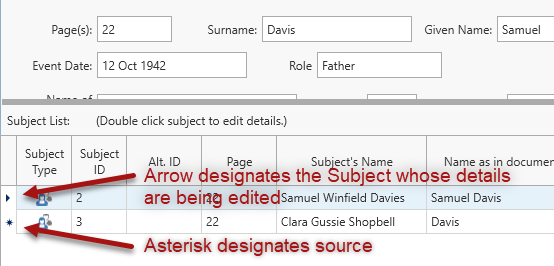 The arrow indicator shows which record is being edited (either in the details pane above if this is a form-based template, or in the same row if a tabular style template).
Before any details can be copied there needs to be a Subject already linked to the Information Record and designated as the source for copying (an asterisk indicator appears in the left-most column).
When a Subject record is selected for both editing and as the source for further copying, only the asterisk is visible.
When the copy mode is active, any time a new Subject is created or a single existing Subject is linked to the Information Record, the details values from the "source" Subject will be immediately copied to the one just added. The newly added Subject will then be designated as the copy source for further additions.
 When using the Link button to link existing Subjects to the Information Record, if multiple Subjects are selected to be linked in the same Link action, the copying of details does not occur until designated by the user. This is done to allow the user to control the order in which the copying is done (important in cases where there is a line number that is automatically incremented), or even done for all records.
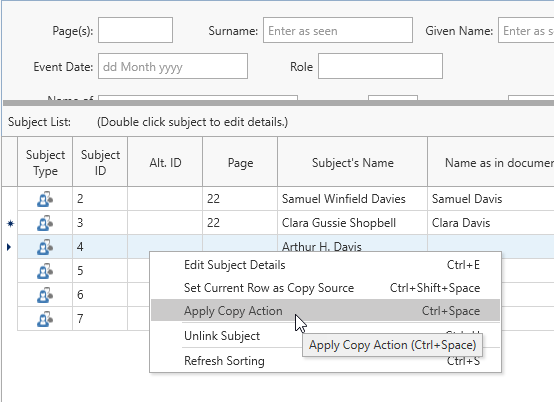
To apply the copy action to a selected record, do one of the following in either the list of linked Subjects (form-based templates) or the grid of Subject details (tabular templates):
-
Right-click the row to display the context menu. Select Apply Copy Action.,
-
Press Ctrl-Spacebar when the row is selected, or
-
Ctrl-Click the row.
You can also change which Subject will be the copy source by doing one of the following in either the list of linked Subjects or in the case of tabular templates, the grid of Subject details:
-
Right-click the row to display the context menu and select Set Current Row as Copy Source,
-
Press Ctrl+Shift+Spacebar, or
-
Ctrl+Shift+Click the desired row.
You can copy data more than once to the same row if you have made changes in the source row and want to add those to the target row. Just designate the row to serve as the copy source and then apply the copy action to the target row (using the methods just described above).
Data is only copied to the target row when the field in the target row is blank. The copy action discussed here will not overwrite existing data.
Editing the Subject Record
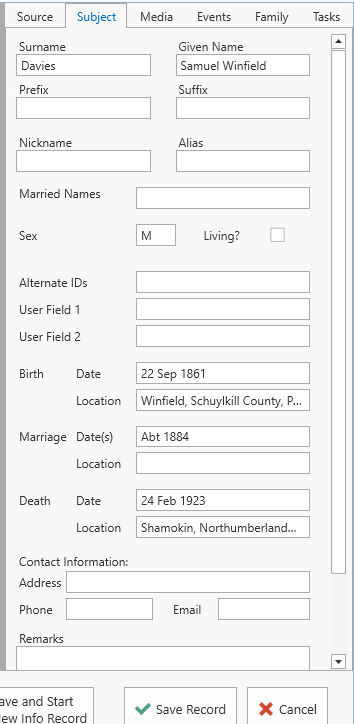 The data entered into Information Records reflects what was shown in the document you found, and you could link Subjects to this record. However, what if you want to edit the Subject record itself, such as adjusting the spelling of the name of a person that will appear in the main list of Subjects. Obviously, this can be done in the Subject editor, but you can also do this without exiting the Information Record editor by going to the right-side panel and clicking on the Subject tab. The Subject panel contains all the editable data fields making up a Subject record.
The Subject whose record is displayed in the side panel will be whichever Subject is currently selected in the Subjects list (form-based templates) or the grid of Subject details (tabular templates). If no Subject is selected, the fields in this panel will be blank and non-editable.
When a new Subject record is created to link to the Information Record being edited, the name of the Subject in the Subject record will be filled in based on the name entered in the Information Record details for that person. However, once you edit the name in this side panel, it will be remain as you entered it and not change again if you happen to edit the name fields in the details.
Any changes you make in this side panel will be saved only if you save the Information Record being edited.